Logic Gate Simulator
A downloadable game for Windows
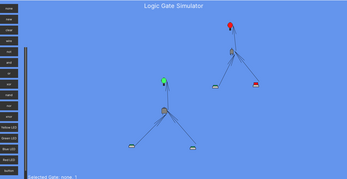
This project is a game/simulator/digital toybox that provides logic gates and the ability to connect them. It includes all the basic logic gates (not, and, or, xor, etc)
The "new" button allows for creating custom components, though the way it works is rather unpolished/annoying Specifically, it orders inputs and outputs based on the order that buttons/lights were placed in the world
To select a different output when building wires, use the number buttons
Libraries used: -Monogame framework -Apos input -Myra UI
How to Use:
-click on the component you want to add and then click anywhere on the blue screen
-for the wires (you will need the components you want to connect first):
1.) click on wire
2.) click on the component you want the wire to start from
3.) click on the component you want the wire to end at/connect to
-try this for fancy stuff:
1.) make a new circuit
2.) press new
3.) click on blue screen
4.) scroll down and click on custom_0
5.) click on blue screen and now that circuit is concise to the chip and you can use it to make even bigger circuits
-xnor, nor, and nand do not work so do not use those (everything else does)
Notes:
--created this simulator with two other people for a hackathon
--we did it in less than 24 hours.
Devlog
--12/23/2024 uploaded new version
| Status | Released |
| Platforms | Windows |
| Authors | b3lla-gam3s, DKMK100 |
| Genre | Educational, Simulation |
Install instructions
1.) download the zip file
2.) extract the zip file
3.) open the extracted folder
4.) open the ToyBox application that is located in the extracted folder

Comments
Log in with itch.io to leave a comment.
-worked with https://dkmk100.itch.io/ + one other friend (forgot to add author/contributor while submitting it)
-click on the part you want to add and then click anywhere on the blue screen
-for the wires (you will need the components you want to connect first):
1.) click on wire
2.) click on the component you want the wire to start from
3.) click on the component you want the wire to end at/connect to
-try this for fancy stuff:
1.) make a new circuit
2.) press new
3.) click on blue screen
4.) scroll down and click on custom_0
5.) click on blue screen and now that circuit is concise to the chip and you can use it to make even bigger circuits
-xnor, nor, and nand do not work so do not use those (everything else does)